Leave Your Message

How to Choose the Right Ceiling Chandeliers?

Choosing Ceiling Chandeliers is about more than finding a striking shape. The fixture must suit the room’s scale, ceiling height, light needs, and daily use. A broad, low chandelier can crowd a compact dining nook. A narrow pendant may look lost above a long table. Stand beneath the planned location and picture the fixture’s lowest edge; that simple check can reveal awkward clearance before installation.

Energy matters, too. The U.S. Department of Energy’s Energy Saver guidance says, “LEDs use at least 75% less energy” than incandescent lighting. That figure is useful when comparing bulbs and long-term running costs, though actual savings depend on use and fixture compatibility. Check the manufacturer’s specifications before choosing dimmable LEDs. Some combinations flicker or dim unevenly.

Light also affects how a room feels. Researcher Dr. Mariana Figueiro, known for studying light and circadian health, has emphasized that light’s timing and exposure can influence human biological rhythms. That is a reason to consider color temperature and brightness—not a promise that one chandelier will improve sleep. A warm, adjustable glow may suit evening meals; a brighter setting can help with cleaning or reading.

A practical rule for this guide: “Choose the chandelier for the room you live in, not only the room you photograph.” Treat that as advice, not a technical standard. Measure carefully, check bulb and dimmer compatibility, and consider how shadows fall across faces and tabletops. The right fixture should feel balanced in daylight and comfortable after dark. A beautiful choice can still be slightly wrong for the space. That is worth rechecking.
How to Choose the Right Ceiling Chandeliers?

Assess the Room’s Lighting Needs and Chandelier Purpose

A chandelier should answer a lighting need, not just fill empty ceiling space. Start by noticing what the room lacks at dusk. A dining table may need a clear pool of light, while a living room benefits from softer, layered illumination. In a narrow entry, a bright fixture can feel harsh against pale walls. Check daylight, wall colors, and furniture placement at different times. Small details matter. If people read or prepare food nearby, add task lighting rather than expecting one central chandelier to do everything.

Think about the fixture’s purpose before choosing its size and light output. For conversation, diffuse shades and dimmable bulbs can reduce glare. Over a table, downward light helps keep faces and place settings visible. Ceiling height changes the experience too. A low ceiling usually calls for a compact profile, while a taller room may suit a longer drop that still clears walking paths. Measure before buying. Check beam spread, bulb brightness, and whether light reaches the ceiling. These details are easy to overlook. In practice, a paper plan can mislead; tape a rough outline overhead or use a hanging string to test the height. It is not elegant, but it can reveal awkward proportions early. A chandelier may still leave dark corners, so consider a floor or wall lamp nearby.

Measure the Space and Check Ceiling Height

Start with a tape measure, not the chandelier photo. Record the room’s length and width in feet, then add those numbers. The total, expressed in inches, offers a practical starting point for fixture diameter. An 11-by-13-foot room, for example, often suits a chandelier about 24 inches wide. Treat this as a guide, not a rule. A broad shade may feel crowded in a narrow room, even when the calculation looks right. Measure the table, too, and check that the fixture will not dominate nearby cabinets or doorways. Small details matter.

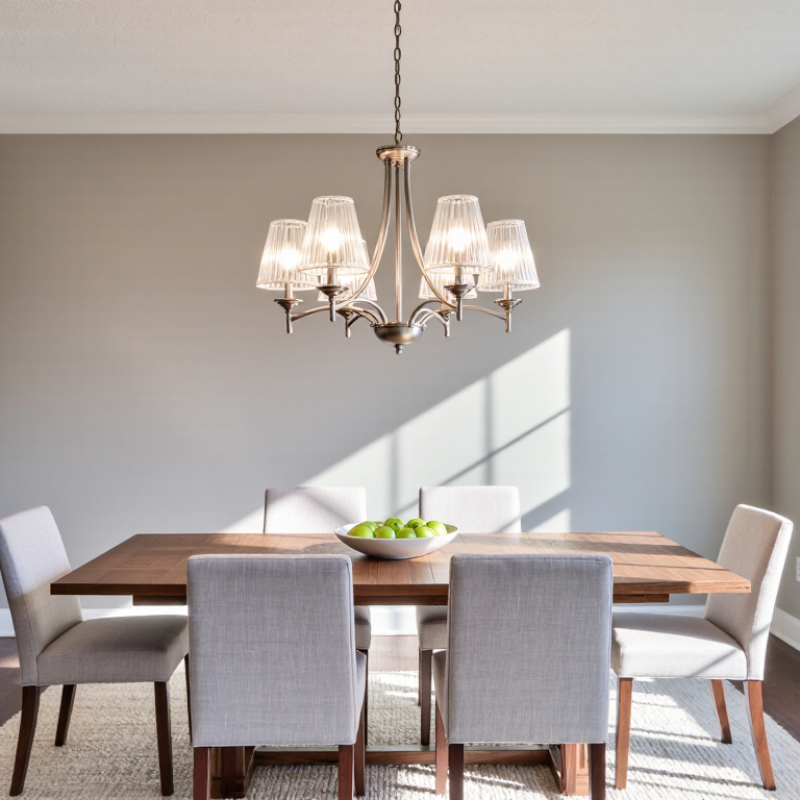
Ceiling height determines how much hanging space you have. In a dining area with an 8-foot ceiling, the chandelier’s bottom is commonly positioned 30 to 36 inches above the tabletop. With taller ceilings, raise it gradually, while checking sightlines from seated and standing positions. For walkways, aim for at least 7 feet of clearance beneath the fixture where practical. Include the chain or rod in your measurements; forgetting it is an easy mistake. Sloped ceilings may need a compatible mounting arrangement, so verify the fixture’s installation requirements before buying. Check twice. The first estimate can still look wrong once you see the fixture against the actual room.

Choose a Suitable Chandelier Size, Style, and Finish

Choosing the right chandelier starts with the room’s scale. Add the room’s length and width in feet, then use that number as a rough diameter in inches. A 12-by-14-foot room, for example, often suits a fixture near 26 inches wide. It is only a starting point. Measure the ceiling, furniture, and walking paths before buying. Over a dining table, aim for a chandelier about half to two-thirds of the table’s width. Keep its lowest point roughly 30 to 36 inches above the tabletop, adjusting for sightlines and ceiling height.

Let the style respond to the room rather than compete with it. A sculptural fixture can bring character to a plain space, while a simpler shape may sit more comfortably among patterned wallpaper or detailed furniture. Consider the view from the doorway and from nearby seats. Measure twice. A striking design can still feel oversized once it hangs in place.

Finish affects the room’s overall balance. Compare the chandelier with nearby metal details, such as cabinet pulls, curtain rods, or lamp bases, but matching every finish is not essential. Warm brass can soften a cool, pale room; matte black can define a light ceiling. Check the finish in daylight and after dark, since bulbs change how surfaces appear. A dimmer is useful for adjusting brightness, though not every bulb works with every dimmer. Perfect coordination can feel stiff, too.

How to Choose the Right Ceiling Chandeliers?

Choose a suitable chandelier size, style, and finish by matching the fixture to the room’s dimensions and overall interior design.

Size guide: A widely used sizing rule is to add the room’s length and width in feet, then use that number as the chandelier diameter in inches. For example, a 12 × 12 ft room typically suits a chandelier about 24 inches wide.

Style and finish: Use streamlined metal or glass designs for modern interiors, ornate forms for traditional rooms, and finishes that coordinate with existing lighting, cabinet hardware, or furniture accents.

Compare Light Output, Bulb Types, and Dimming Options

Choosing a ceiling chandelier starts with light output, not appearance. Lumens come first. A 2,000-lumen fixture may suit a compact dining area, but a larger room needs layered lighting. Measure the room, then compare the chandelier’s total lumens with existing recessed or wall lighting. The U.S. Department of Energy reports that LED bulbs use at least 75% less energy and can last up to 25 times longer than incandescent bulbs.

Bulb type changes the experience. Integrated LEDs usually offer a slim profile and efficient output, while replaceable LED bulbs provide easier maintenance. For dining rooms, a color temperature near 2700K to 3000K can create a warm atmosphere. Check the color-rendering index too. A CRI of 90 or higher often shows wood, food, and artwork more naturally. This is a practical preference, not a universal rule. Some rooms still look better under a slightly cooler lamp.

Dimming needs careful checking. The dimmer, bulb, and fixture must share compatible technology. ENERGY STAR guidance emphasizes using certified lighting products for performance and control reliability. A dimmable label alone is not enough; buzzing, flicker, or a narrow brightness range can appear after installation. Test before drilling. In my experience, a chandelier that dims smoothly from bright cleaning light to soft evening light feels more useful than one with higher advertised output. I would also question overly precise lumen claims when shades, ceiling height, and bulb placement reduce real-world brightness.

Verify Installation Requirements, Safety, and Maintenance

Choosing the right ceiling chandelier begins above the ceiling, not below it. Verify the existing junction box can support the fixture’s full weight. A decorative plate cannot compensate for weak framing. For heavier chandeliers, use a listed support brace or direct structural attachment, installed by a qualified electrician. Turn off the circuit breaker, then test the wires with a voltage tester. Do not trust the wall switch alone.

Safety deserves measurable attention. The National Fire Protection Association’s Home Structure Fires report found that electrical distribution and lighting equipment contributed to an estimated 32,000 U.S. home fires annually from 2015 to 2019. These fires caused about 470 civilian deaths and $1.3 billion in property damage. Those figures changed how I inspect lighting installations. Check grounding, wire connectors, insulation, and canopy clearance. Keep the lowest part safely above walking areas, stairways, and doors. Follow local electrical codes, even when the installation looks simple.

Maintenance is easy to underestimate. Inspect the chain, stem, screws, and ceiling plate every few months. Look for sagging, darkened insulation, flickering, buzzing, or unusual heat. Stop using it immediately if these signs appear. Clean crystals with a dry microfiber cloth after switching power off. Avoid spraying cleaner near sockets. Confirm that lamps match the fixture’s rated wattage and dimmer compatibility. I used to treat dust as cosmetic only; it can also hide heat damage and loose connections. A second inspection is rarely wasted.

How to Choose the Right Ceiling Chandeliers? - Verify Installation Requirements, Safety, and Maintenance
Evaluation Dimension Recommended Benchmark What to Verify Before Purchase Safety or Maintenance Reason Priority
Room and ceiling height For general rooms, keep the bottom of the chandelier about 2.1 m or higher above the floor. Over dining tables, a common starting point is approximately 75–90 cm above the tabletop. Measure the floor-to-ceiling height, table height, chandelier height, and adjustable chain or rod length. Provides comfortable head clearance and reduces the risk of accidental contact. Essential
Chandelier size and visual proportion For a dining table, the fixture diameter is often selected at approximately one-half to two-thirds of the table width. For open rooms, consider the room dimensions and viewing distance. Compare the fixture diameter with the room, table, furniture layout, and walking paths. Proper proportion improves light distribution and helps prevent obstruction in circulation areas. High
Electrical supply and circuit Confirm the supply voltage, frequency, grounding arrangement, and circuit capacity specified for the installation location. Have a qualified electrician check the existing wiring, switch, junction box, and circuit protection. Incorrect voltage, damaged wiring, or overloaded circuits can cause electric shock, overheating, or fire. Essential
Ceiling outlet box and support The electrical box and mounting hardware must be approved for the fixture load and securely attached to suitable structural support. Check the fixture weight against the box and mounting hardware ratings. Heavy fixtures may require additional structural bracing. A standard light-duty box may not safely support a heavy chandelier, increasing the risk of detachment. Essential
Mounting surface Use hardware appropriate for the ceiling material, such as wood framing, concrete, masonry, or a suspended ceiling system. Identify the ceiling construction and verify that anchors, screws, and brackets are compatible with it. Correct fasteners help prevent vibration, loosening, and structural failure. Essential
Wet or damp location suitability For bathrooms, covered outdoor areas, or other humid locations, select a fixture with an electrical location rating suitable for the environment. Check the product safety marking and installation instructions for dry, damp, or wet location use. Moisture can corrode components and increase the risk of shock or short circuits. High
Bulb and lamp compatibility Use only the lamp type, base, wattage, voltage, and temperature rating specified for the fixture. Verify lamp dimensions, maximum wattage, heat output, and whether enclosed-fixture use is permitted. Excessive heat can damage sockets, wiring, finishes, or nearby ceiling materials. Essential
Dimmer and control compatibility LED lamps and integrated LED drivers should be compatible with the selected dimmer and control system. Confirm dimming method, minimum load, flicker performance, and whether the fixture requires a dedicated driver. Incompatible controls may cause flicker, buzzing, shortened lamp life, or overheating. High
Light output and color quality Select lumen output according to room size and task needs. Warm white light around 2700–3000 K is commonly used for living and dining areas. Review lumens, color temperature, beam direction, glare control, and color-rendering information. Appropriate light output improves visibility while reducing glare and unnecessary energy use. Medium
Installation procedure Turn off the circuit at the breaker, verify that power is off, and follow the fixture instructions. Use a qualified electrician where required. Confirm whether local regulations require a licensed electrical professional or inspection. Isolation and correct wiring reduce the risk of shock, fire, and installation defects. Essential
Cleaning schedule Dust the fixture periodically; clean more frequently in kitchens, high-traffic areas, or rooms with airborne particles. Use a soft, dry or slightly damp cloth as allowed by the finish. Switch off and allow lamps to cool before cleaning. Dust reduces light output and can accumulate heat around lamps and electrical components. Medium
Fastener and wiring inspection Inspect visible screws, chains, rods, canopy fittings, and signs of cable damage at least annually or after unusual vibration. Look for looseness, discoloration, frayed wires, corrosion, flickering, buzzing, or unusual heat. Early detection helps prevent falling fixtures, electrical faults, and fire hazards. High
Replacement and repair access Ensure lamps, drivers, sockets, crystals, and other serviceable parts can be reached safely. Check whether a stable ladder, adequate working space, and replacement parts will be available. Safe access reduces the risk of falls and discourages unsafe improvisation during maintenance. High
Environmental and material conditions Choose finishes and materials suitable for expected humidity, temperature changes, dust, and cleaning products. Check for corrosion resistance, heat tolerance, surface-care instructions, and compatibility with the room environment. Suitable materials preserve structural integrity and appearance over time. Medium
Important: The benchmarks above are general planning guidance. Always follow the chandelier manufacturer’s installation instructions and the electrical and building regulations applicable in the installation location.